At some point, a client may wish to have the enhancements removed. There is a quick and safe way to remove nails without damage to the natural nail. There are many ways to do this, and we will cover the main techniques; however, we much prefer the first method.
Nail Enhancement Removal
A common myth is that enhancements should be taken off every few months to let the nail plate ‘breathe’. There is no scientific evidence to support this notion. Nail plates do not require time to breathe, nor are they capable of breathing. Each time product is removed and reapplied, the underlying nail plate becomes thinner and weaker. This is especially true when the enhancement is picked or pried from the nail plate. Improper removal is a crime against the client’s nails. It is a major reason for natural nail damage as these are not gentle techniques. Each of these techniques will rip up layers of natural nail plate. You must take your time or the client’s nails will suffer the consequences.
Cross-linking makes enhancements more resistant to solvents in nail polish and polish removers. Unfortunately, it also makes product removal more difficult. Only uncross-linked polymers dissolve in solvents. Cross-links prevent the enhancements from dissolving. Then, how is the product removed? The solvent swells the polymer network until it breaks into chunks. The same effect is seen when a roll of paper towels is put into a bucket of water. It will break up even faster if you poke it with a stick. The enhancement will also swell more quickly if the solvent is slightly warm. Warming the solvent can cut product removal time in half.
The “Bowl” Soaking Method
 Remove all traces of nail enamel, and remove any surface shine with a 240-grit file. Pre-filing the surface will allow the remover to quickly penetrate the molecular structure of the enhancement. Ask the client to remove all jewelry from wrists and fingers.
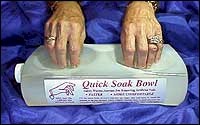
- Fill the Quick Soak bowl with hot tap water to the fill line. Squeeze the bottle to remove excess air and tightly seal the cap.
- Pour enough remover into the fingerbowls to cover the nails. Drop a few marbles into each fingerbowl to give the client something to ‘play’ with while her nails are soaking. Make sure the entire nail or nails are covered with the solution.
- Cover the hand and dish with a terry towel and soak for 15 to 30 minutes. Do not lift the nails out of the remover for the entire time. Lifting the nails from the remover will allow the nail product to ‘set-up’ again, and will extend the removal time. Covering the hands and dish with a terry towel will help to prevent rapid evaporation of the remover, and prevent any warmth from escaping.
- Lift the towel off and with the nails still submerged, lightly layer the product from the nails with a cuticle pusher. Gradually remove all product from the natural nail.
- After all product has been removed, lift the hands from the remover and wipe the hands and nails with a towel. Buff any remaining product from the nails with the fine side of a Koala Buffer™ (Creative Nail Design Systems).
- You may wish to ask the client to wash her hands and scrub her nails with a soft nail brush or toothbrush. Do not vigorously scrub the nails at this point.
- Condition the nails and skin with oil, then massage the entire hand with lotion.
- Wash hands and nails to remove lotion and oils, apply the service (reapply product, or polish the nails).
- Prescribe a home care program that will continue the health and beauty of the new service.
- Retail the recommended home care products to your client, and book her next appointment.
NOTE: Please be aware that the manufacturer of these specific bowls may no longer be in business. If you like this method, you may also warm the mixture in a ‘bowl-within-a-bowl’. To do this, put some flat marbles in a medium size dish and fill part way with hot water. Place a smaller dish filled with acetone into the hot water filled dish. The results will be the same.
Foil Wrap Removal Method
Sometimes a client may prefer not to sit in one place while having her nails removed, or there may not be a designated area in your salon for product removal. In either case, try this ‘wrap’ removal method.
- Remove all traces of enamel and buff the enhancement surface with a 240-grit file to prepare the product for removal.
- Loosen the cap on the bottle of remover and hold the bottle under warm tap water for a minute or two, but no more than 5 minutes.
- Saturate a cotton pad, cotton ball, or gauze pad with remover, and place on the surface of the enhancement.
- Seal the cotton pad by tightly encasing it in a square of tin foil.
- Apply each pad and foil seal individually to prevent evaporation of the remover.
- Soak in this manner for 20 to 30 minutes. Remove one ‘wrap’ to check for progress, and lightly slough the product from the nail surface with a cuticle pusher or orangewood stick.
- After all product has been removed, buff the nail surface with the fine side of a Koala Buffer™ to ensure all product has been successfully removed.
- Condition the skin and nails with oil and massage entire hand with lotion.
- Wash hands and nails to remove lotion and oils, apply the service (reapply product, or polish the nails).
- Prescribe a home care program that will continue the health and beauty of the new service.
- Retail the recommended home care products to your client, and book her next appointment.
There is no set time period for complete product removal. The length of time depends entirely on the type of product; i.e., acrylic, wraps or gels, and the thickness of the material. The thicker the product, the longer the client will have to soak.
Most gel products are difficult to remove because they are highly cross-linked and resistant to many solvents. Usually, the product must be filed from the nail plate. This can damage the plate and underlying bed if not performed with care. The heavy consistency often causes gel users to apply the product too thickly. This creates unnatural and unsightly enhancements and makes removal very difficult. Gel enhancements should only be removed when it is absolutely necessary as gel removal is a time-consuming process.
If you must remove gel enhancements, use the following guidelines:
- Slowly file (not drill) the enhancement with a medium-grit file, leaving a very thin layer of product. Do not file all the way to the natural nail plate.
- Soak in warm product remover.
- Once softened, scrape the remaining product from the nail plate with an orangewood stick.
Use Some Solvent Sense!
Never warm a solvent with an open flame, stove, microwave, blow dryer, or other similar devices. Solvents should be warmed with extreme care! Most are highly flammable. Warm only enough solvent to do the job. Take care to avoid any open flames, sparks, or other sources of ignition, (i.e., cigarettes and cigarette lighters.) Warm solvents and their vapors are even more flammable!